Two spoons of cold water and one flat edge of silver, that is how my morning starts now. There is something almost absurdly luxurious about pressing a chilled gua sha tool into warm, sleepy skin while the coffee drips in the other room. But this morning skincare routine has become my favorite fifteen minutes of the day, and honestly, it has done more for my face than any serum ever did alone.
Look, I know the internet is drowning in gua sha content. But here is what actually works when you are half awake, still in your silk pajamas, and trying to convince yourself that getting out of bed is a good idea. This is the exact method I use, down to the order of the strokes and the pressure I apply. No fluff, no thirty-step rituals, just a practical way to wake up your face and get that glow before you even touch your concealer.
Why Gua Sha in the Morning Feels Different Than at Night
Massage at night is about undoing the day, releasing tension, and calming down. But morning gua sha is a completely different animal; it is about circulation, drainage, and telling your face to wake up like you mean it. At night, I go slow and heavy. In the morning, I use lighter pressure, faster sweeps, and focus on the areas that tend to look puffy or flat after eight hours of lying down.
The other difference is the temperature. I keep my silver tool on the nightstand, so it is cool from the overnight air, not ice cold from the fridge. That gentle coolness constricts blood vessels slightly, which reduces puffiness around the eyes and gives you that wide-awake look without a drop of caffeine.
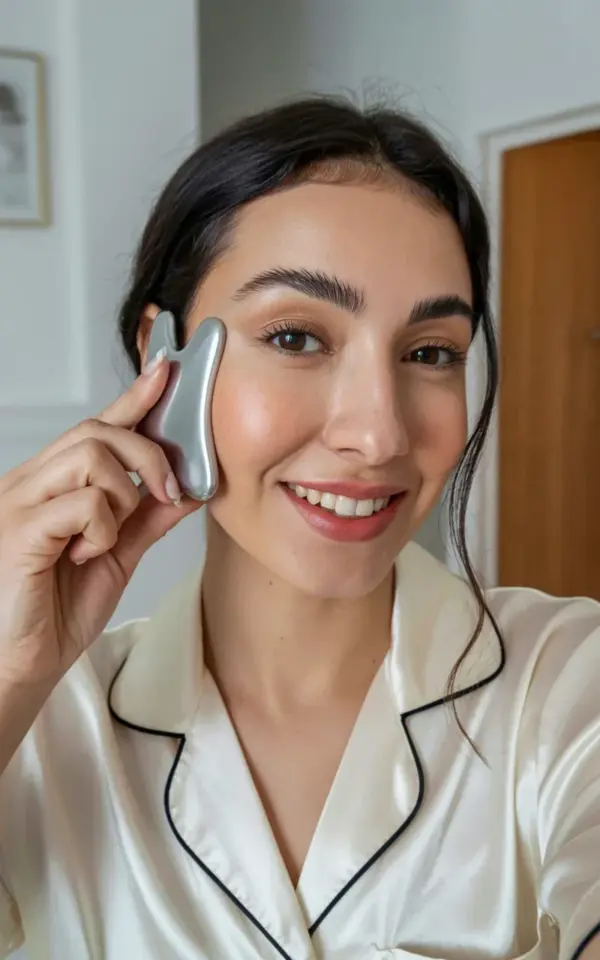
The visual from my own morning routine is pretty telling. I am usually three steps out of bed, hair pulled back with loose strands around my face, wearing a cream silk pajama top with black piping. I hold the tool flat against my cheek, smiling because the pressure genuinely feels good. That genuine smile is the secret; you have to relax your face for this to work.
What You Need Before You Start the Facial Massage
Gua sha is simple, but you cannot just drag a piece of stone or metal across dry skin. You need slip, or you will pull at your skin and do more harm than good. Here is my exact setup:
– A silver gua sha tool (I prefer silver because it stays cool longer, but jade or rose quartz works)
– A lightweight facial oil or a very hydrating essence
– Clean hands and clean skin
– About five minutes of undivided attention
– Silk pajamas, optional but highly recommended for the mindset
I use three drops of oil on each side of my face. Too much and the tool slides around with zero control. Too little and you are dragging everything. The goal is a thin, even layer that lets the tool glide but still gives you enough friction to actually move the tissue underneath.
And yes, the silk pajamas thing matters more than you think. There is something about wearing something soft and pretty that changes how you approach self-care. It is harder to rush through the ritual when you feel like you are already in a spa.
The 4-Minute Gua Sha Sequence I Swear By
I have tried the elaborate fifteen-step routines with all the fancy mapping diagrams. Here is the thing: you do not need them. This is the streamlined version I actually do every morning, and it takes four minutes on the left side and four on the right.
Start with your neck. Tilt your head slightly to one side, take the curved edge of your tool, and sweep from your collarbone up to your jawbone. Do this five times slowly. The neck is where your lymph fluid collects overnight, so you have to clear the highway before you can work on the face. Skip this and the rest of the routine is less effective, simple as that.
Then move to the jawline, which is where I hold the tool in the photo. Place the curved edge under your chin and drag it along your jawbone toward your ear. This is not a deep-tissue massage, keep the pressure light, just enough to feel the muscle moving underneath. Seven strokes on each side.
For the cheekbone line, this is the money spot for that glowy skin look. Start at the side of your nose, just below the cheekbone, and sweep outward toward your hairline. I like to pause at the outer edge for a second, it feels like hitting a tiny release button. Do this six times, keeping your jaw relaxed and your mouth slightly open.
Getting the Base Right for the Glowy Skin Effect
Here is the part that most instructions skip: the facial massage is only half the battle. The other half is what you put on your skin before the tool ever touches it. The oil or essence you choose sets the whole tone, and it needs to be something that your skin actually drinks up, not just something slick.
My preference is a squalane-based oil with a touch of rosehip, but any lightweight oil works. Drop it onto damp skin, not dry skin. The water helps the oil spread thinner and sink in faster. If you want an extra glow boost, mix one drop of liquid highlighter into your oil. I know it sounds lazy and maybe a little extra, but it gives your skin a lit-from-within finish that no amount of powder highlighter can replicate.
Let the oil sit for thirty seconds before you start the massage. This is not a wasted thirty seconds. It gives your skin a chance to soften, which means the tool moves more smoothly and you get better results with less effort. I use that time to press the cool tool against my palm for a second, just to sync temperatures.
Working Gua Sha Into Your Morning Routine Without Rushing
The fastest way to abandon any new habit is to make it complicated. I tried adding gua sha to my pre-work routine once, and it lasted exactly two days before I gave up. The solution was not better discipline, it was better timing.
Now I do it while my coffee brews. The ritual takes about ten minutes, which is exactly how long my kettle takes to boil and my French press needs to steep. I stand at the kitchen counter in my silk pajamas, tool in hand, and by the time the coffee is ready, my face is done.
If you have a really slow morning, which the Pinterest image of this routine fully captures, you can stretch it out. Sit by the window, let the light hit your face, and work through the sequence slower than you think you need to. The cool silver against your cheek, the bit of loose hair falling into your face, the quiet before the day gets loud, that is the cozy self-care part that makes this feel like a treat instead of a chore.
The trick is to never, ever rush the strokes. Fast gua sha is just irritating your skin. Slow and deliberate is the entire point.
Tools, Pressure, and the Mistakes I Made So You Do Not Have To
Listen, I have been through three gua sha tools and made every beginner error in the book. The first one was a jade roller, which felt nice but honestly did nothing for drainage. The second was a heart-shaped stone with edges that were too blunt, all it did was slide across my face without moving any tissue.
The one that changed everything was a silver tool with sharp, defined edges. The difference is the grip. You want a tool that you can hold with control, not one that slips around in your fingers. The shape should have a curved notch for your chin and a long, straight edge for your jaw.
Pressure is another place people go wrong. You should never be in pain, but you also should not feel nothing at all. The sweet spot is the kind of pressure you would use to knead a stiff muscle after a workout, firm but not aggressive. If you are bruising, you are pressing too hard. If you are just tickling the surface, you are wasting your time.
One last thing, don’t use gua sha on broken skin, active breakouts, or right after any kind of chemical peel. Wait until your skin is calm. And always wash your tool with soap and water after you use it, silver stays clean longer than stone, but it is not self-cleaning.
What Comes After the Massage to Seal It All In
After your facial massage is done, your skin is warm, slightly flushed, and primed for anything you put on top. This is the moment to apply your moisturizer and sunscreen, and trust me, your skin is going to absorb them better than it would on a day you skip the massage.
I pat, I do not rub. The massage already moved things around, so you want to set everything back down gently. Warm a pea-sized amount of moisturizer between your palms, press it onto your face, and then follow with SPF. The massage increases circulation, which means your products sink in faster and deeper.
If you are someone who wears foundation, you will notice it applies differently on gua sha mornings. It glides on, it blends easier, and you need less of it because your skin already has life to it. That glow is not makeup, it is your blood moving.
One morning a week, I skip the moisturizer and just finish with rosewater spray. My skin seems to like the occasional minimalist finish, and it reminds me that this routine is about feeling good, not just looking good.
Making the Ritual Yours Without Overthinking It
The internet wants you to believe there is one perfect way to do this, and I am telling you there is not. Some mornings you will do the full sequence with the neck strokes and the temples. Other mornings you will get two minutes in and decide that your cheek area just needs the main sweep, and that is fine.
The point is showing up. The point is standing in your kitchen or your bathroom, a silver tool in your hand, feeling the cool metal against your warm skin, and letting that be the calmest moment of your day. The glowy skin is a beautiful side effect, but it is not the whole story.
Try it on your next slow morning. Put on your favorite silk pajama top, pull your hair back, and spend ten quiet minutes pressing the tension out of your jaw and cheeks. And then send me a message, tell me if your face did not feel completely different afterward. I genuinely want to know if it works for you the way it has worked for me.
Leave a Comment